Fetching data through Get request
Fetching data through Get request using Alamofire
The installation of Alamofire and its configuration to send requests to the application programming interface (API), which transfers data between the server and the iOS application, were covered in the previous portion of the course. This section will demonstrate how to use Alamofire to retrieve the data using a Get request.
Get Request
Using Alamofire, submitting a get request is fairly easy. For this, Alamofire’s request technique is employed. Below is the syntax.
					Alamofire.request("http://url.com/get").responseJSON{ response
    in
    print(response.request)
    print(response.result)
    print(response.response)

    if let result = response.result.value{
    Print(result)
    }
}
All we need to know when submitting a get request with Alamofire is the API URL. Upon success, we obtain a response object that we can use to parse the response result value in our response model.
Example
The Apple dummy API URL https://itunes.apple.com/search?media=music&term=bollywood will be used in this example. Here, we’ll build an application that shows the user API data through a dynamic table view. We will make a get request to the API in this application, and after that, we will fill the tableview with the API data.
To install Alamofire in the program and open the xcworkspace file, follow the instructions in the preceding chapter. Make an Alamofire get request to print the API data after creating a MainViewController class.
					import UIKit
import Alamofire


class ViewController: UIViewController {


    override func viewDidLoad() {
        super.viewDidLoad()
        // Do any additional setup after loading the view.
        loadJsonData()
    }
    func loadJsonData()
    {
       Alamofire.request("https://itunes.apple.com/search?media=music&term=bollywood").responseJSON { (response) in
                        print("Response.result.value \(response.result.value!)")
        }
    }
}
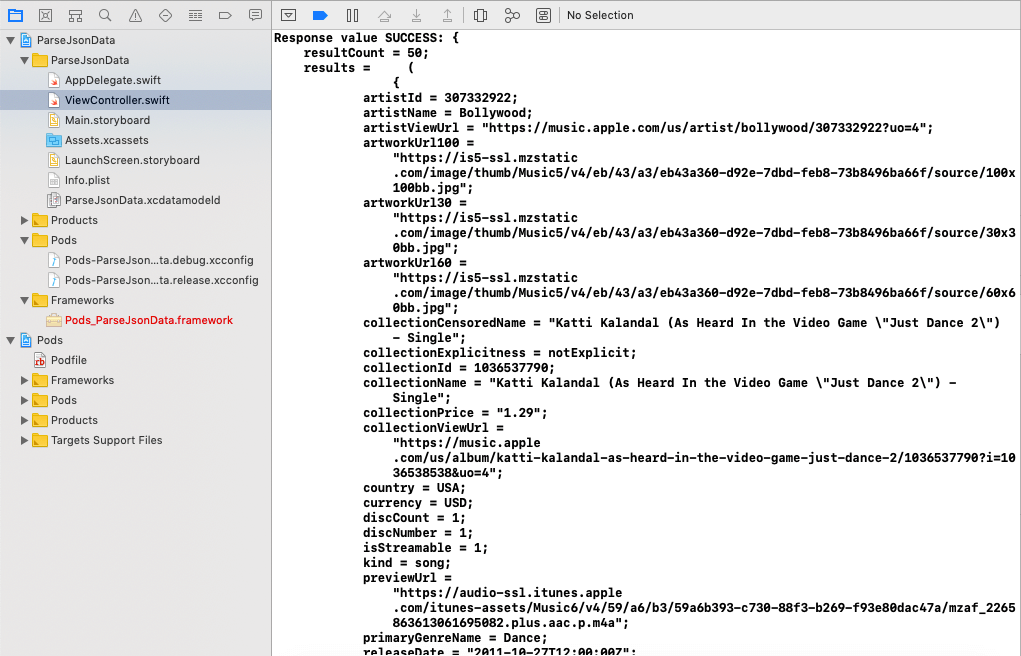
The above application will print the response in the console, as shown below.

The final result count in this case is 50. Here, we’ll use TableView to design our interface builder and display the data.
Main.storyboard
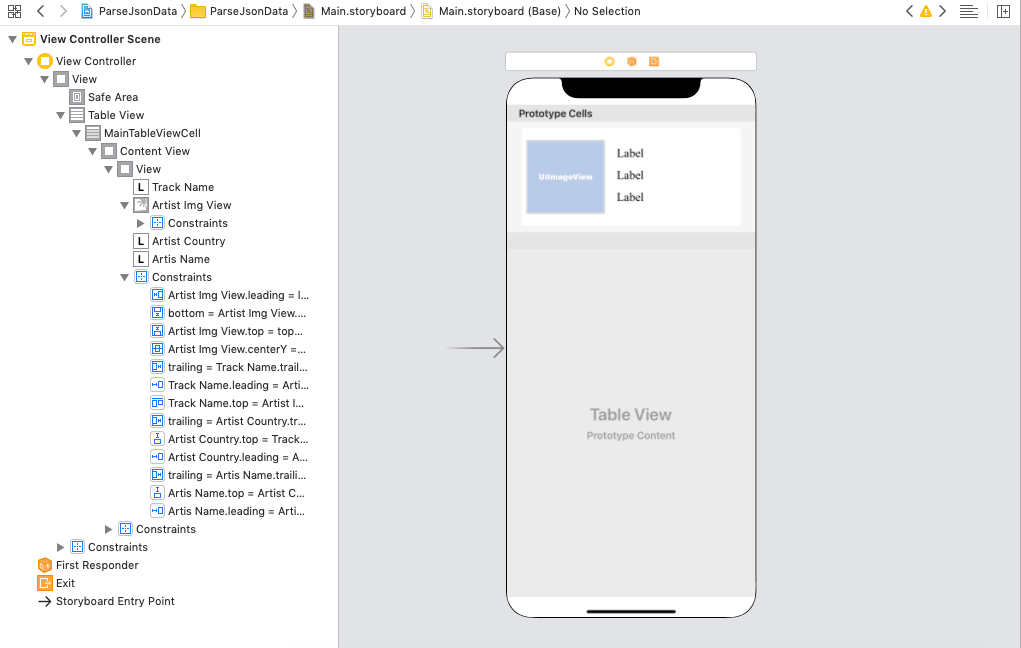
We will add a tableview inside the UIViewController in the storyboard file. An imageview and labels displaying the Collection Artist name, Artist nation, and Artist name will be added to the Prototype cell. We will create the appropriate outlets and assign this cell to the MainTableVIewCell subclass.

MainTableViewCell.swift
					import UIKit

class MainTableViewCell: UITableViewCell {
    @IBOutlet weak var trackName: UILabel!
    @IBOutlet weak var artistImgView: UIImageView!

    @IBOutlet weak var artisName: UILabel!
    @IBOutlet weak var artistCountry: UILabel!
    override func awakeFromNib() {
        super.awakeFromNib()
        // Initialization code
    }


    override func setSelected(_ selected: Bool, animated: Bool) {
        super.setSelected(selected, animated: animated)


        // Configure the view for the selected state
    }
}
ViewController.swift
					import UIKit
import Alamofire


class ViewController: UIViewController {


    @IBOutlet weak var tableView: UITableView!

    var artist = [[String:Any]]()


    override func viewDidLoad() {
        super.viewDidLoad()
        // Do any additional setup after loading the view.
        loadJsonData()
        tableView.delegate = self
        tableView.dataSource = self
        //tableView.rowHeight = UITableView.automaticDimension
    }
    func loadJsonData()
    {
       Alamofire.request("https://itunes.apple.com/search?media=music&term=bollywood").responseJSON { (response) in
            print("Response value \(response)")

            print("Response.result.value \(response.result.value!)")

        if let json = response.result.value as! [String:Any]?{
            if let responseValue = json["results"] as! [[String:Any]]?{
                self.artist = responseValue
                self.tableView.reloadData()
            }
        }
        }
    }
}


extension ViewController : UITableViewDataSource{
    func tableView(_ tableView: UITableView, numberOfRowsInSection section: Int) -> Int {
        return artist.count
    }

    func tableView(_ tableView: UITableView, cellForRowAt indexPath: IndexPath) -> UITableViewCell {
        let cell = tableView.dequeueReusableCell(withIdentifier: "MainTableViewCell") as! MainTableViewCell
        if(artist.count > 0){
            do{
            let artistData = artist[indexPath.row]
            cell.artistImgView.image = try UIImage(data: Data(contentsOf: URL(string: artistData["artworkUrl60"] as! String) ?? URL(string: "http://www.google.com")!))
                cell.trackName.text = artistData["trackName"] as! String
                cell.artisName.text = artistData["artistName"] as! String
                cell.artistCountry.text = artistData["country"] as! String
            }catch{

            }

        }
        return cell

    }


}
extension ViewController : UITableViewDelegate{
    func tableView(_ tableView: UITableView, heightForRowAt indexPath: IndexPath) -> CGFloat {
        return 220
    }

}
Output

